Remote Access Setup (new)
Remote Access allows you to connect to you CoachProxy from anywhere in the world, as long as you and your CoachProxy are connected to the Internet!
Before subscribing to the Remote Access Service, you should already have:
- A CoachProxy device installed and connected to a Wi-Fi network in your motorhome.
- An always-on Internet connection in your motorhome.
A note about new vs. old Remote Access services:
Beginning with CoachProxy software version 3.0.8 (released in March 2019), a new Remote Access system is built into CoachProxy. For older CoachProxy versions, see: Remote Access Service (Legacy).
This new system uses a 3rd party service, ngrok.com, to provide remote connectivity, rather than relying on CoachProxy’s home-grown remote access service. Below are the key points to be aware of:
- To use the new Remote Access service, you will need to sign up for a free account on the ngrok web site.
- The ngrok free service randomly assigns you a remote access URL each time your CoachProxy restarts or reconnects.
- You can upgrade to the ngrok paid service which costs $5/month (billed $60 annually) and allows you to choose your own remote access URL.
- As before, remote access still requires that your CoachProxy be connected to an “always-on” Internet connection in your RV.
Setting up ngrok Remote Access
Setting up the new ngrok remote access requires a few steps, explained in more detail below:
- Sign up for a free ngrok account
- Copy your ngrok authentication token into your CoachProxy settings.
- Choose a remote access username and password for your CoachProxy.
- Enable your remote access.
1. Sign up for a free ngrok account
Sign up for a free account on the ngrok.com web site. All you need is your name, e-mail address, and a password.
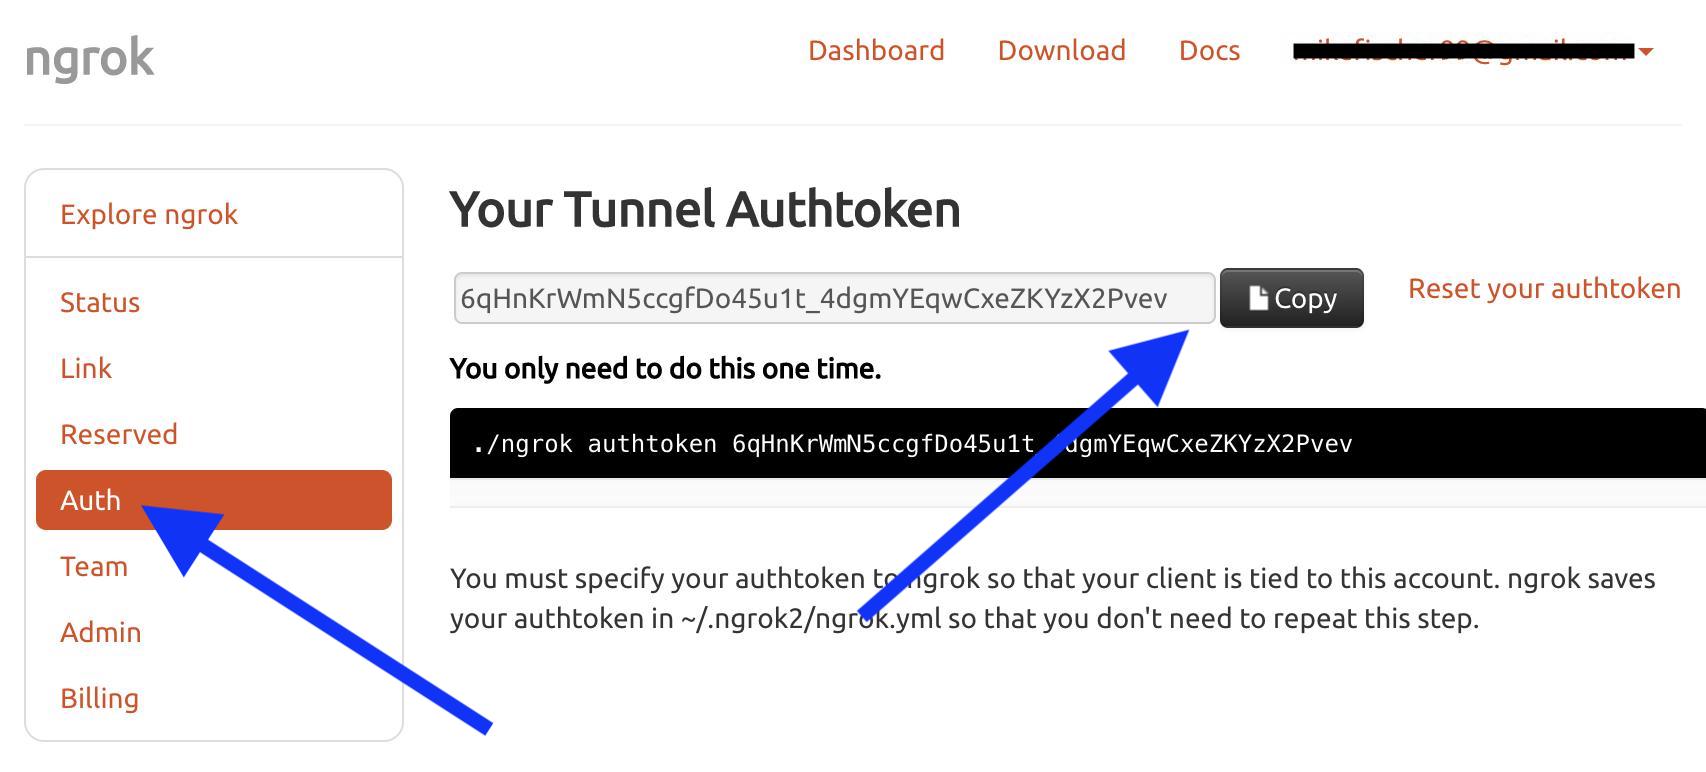
2. Find your ngrok Authorization token
After creating your ngrok account and logging in to the ngrok web site, select “Your Authtoken” from the left-hand menu. You will need to copy and paste this passcode into your CoachProxy in the next step. You can ignore the rest of the information on the page.
3. Enter remote access settings in your CoachProxy
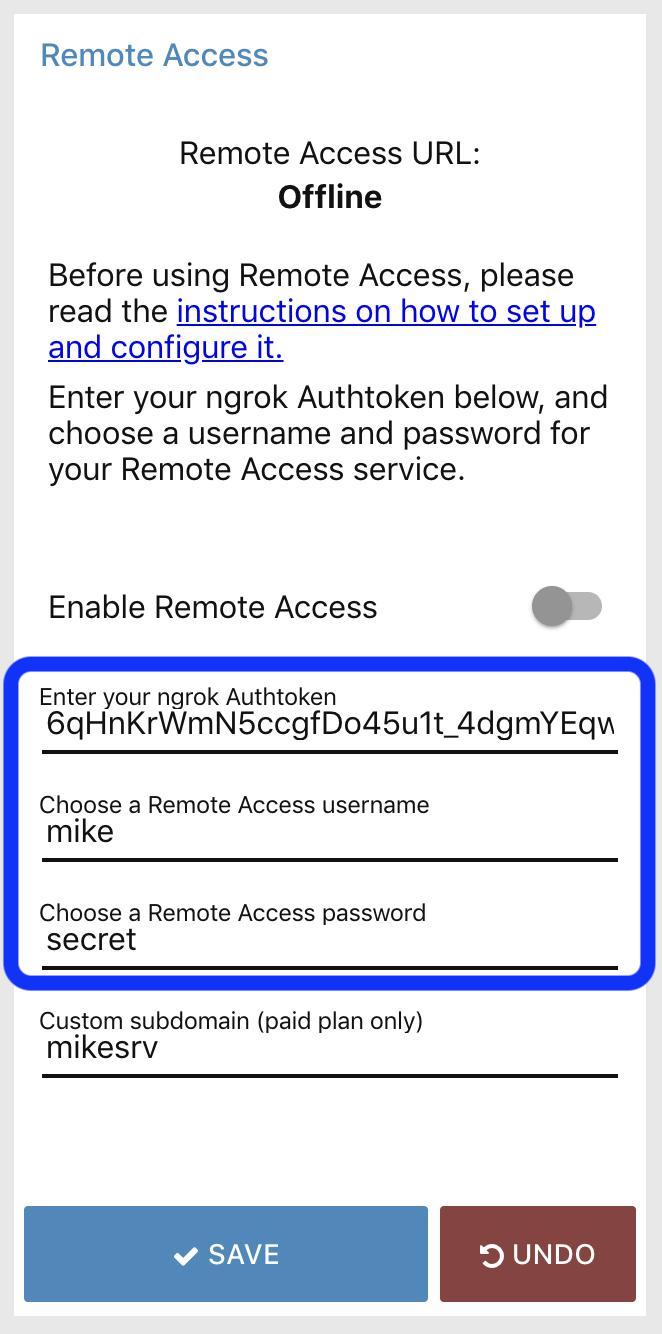
In your CoachProxy’s user interface, go to the “WiFi Settings” page, and find the “New Remote Access” section of the page (see attached photo).
Paste your ngrok Authtoken (from step 2, above) into the Authtoken field in the CoachProxy screen.
Choose a username and password for your remote access. You will need to enter these when you connect to your CoachProxy remotely. These do not need to match your ngrok account or coachproxy.com account.
Choosing a custom subdomain requires a paid ngrok account, and is explained in Step 5 below. You can leave the “Custom subdomain” field blank for now.
When finished, press the “Save” button at the bottom of the Remote Access Settings screen. This will save your settings, but will not yet enable Remote Access. Note: for security, your password will be blanked out after you press “Save”.
4. Enable remote access
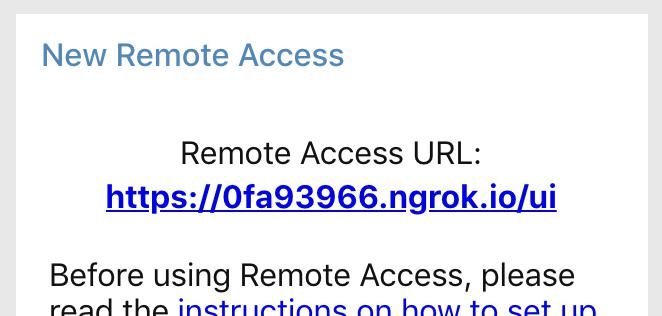
Now use the “Enable Remote Access” switch to turn on your Remote Access. There is no need to press “Save” again—this switch immediately activates or deactivates the service. Progress messages will be displayed near the bottom of the Remote Access screen. Within a few seconds, your connection should be complete, and your new randomly-generated Remote Access URL will be displayed at the top of the screen (see attached photo for a sample).
You can copy this URL to use on your phone or other device, but keep in mind that any time your CoachProxy reconnects to the ngrok Remote Access system, this URL will change! If this happens while you are away from your RV, you can look up your new URL by logging in to the ngrok web site and checking your account dashboard (see attached photo).
5. Using a custom subdomain
With a randomly-generated URL and the ngrok dashboard, you will always be able to remotely connect to your CoachProxy. However, if you choose to upgrade to a paid ngrok account, you can reserve your own custom URL for your remote access. Once reserved, you will always be able to access your CoachProxy at the same, easy to remember URL. Reserve your subdomain through the ngrok web site by selecting “Domains” from the left side menu, and then “Create a Domain”.
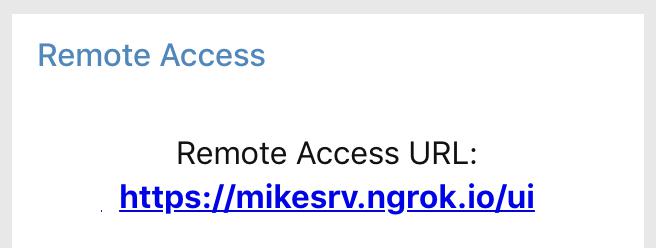
After reserving your subdomain, enter it into the “Custom Subdomain” field of your CoachProxy’s Remote Access Settings, as shown in the sample photo above in Step 3. Once you save your new settings, your remote access will reconnect and your new, custom URL will be displayed. You may use this on any phone, tablet, or computer to access your CoachProxy.
Disclaimer
CoachProxy and Wandertech LLC have no affiliation with ngrok.com or its services. We offer this integration with ngrok as an added benefit for CoachProxy users, but we provide no support for ngrok‘s services or billing.