Re-Installing CoachProxy Software Image
Re-installing your CoachProxy software will reset any saved configuration settings, such as your WiFi network information, notification settings, and pre-sets. After re-installing, you will need to configure your CoachProxy settings again.
Requirements:
- An Internet connection to download the CoachProxy software. The download is approximately 800 MB. If your Internet connection is via a cellular phone or hotspot, please be aware of your monthly data usage limit.
- A microSD storage card. You can re-use the existing card in your CoachProxy, or use a different card. Any microSD card 4GB or larger can be used. We recommend a high speed “Class 10” card.
- A computer with a microSD card slot or card reader to write the software to the card. If needed, your CoachProxy shipped with a microSD to SD card size adapter.
Which Software Version Do I Need?
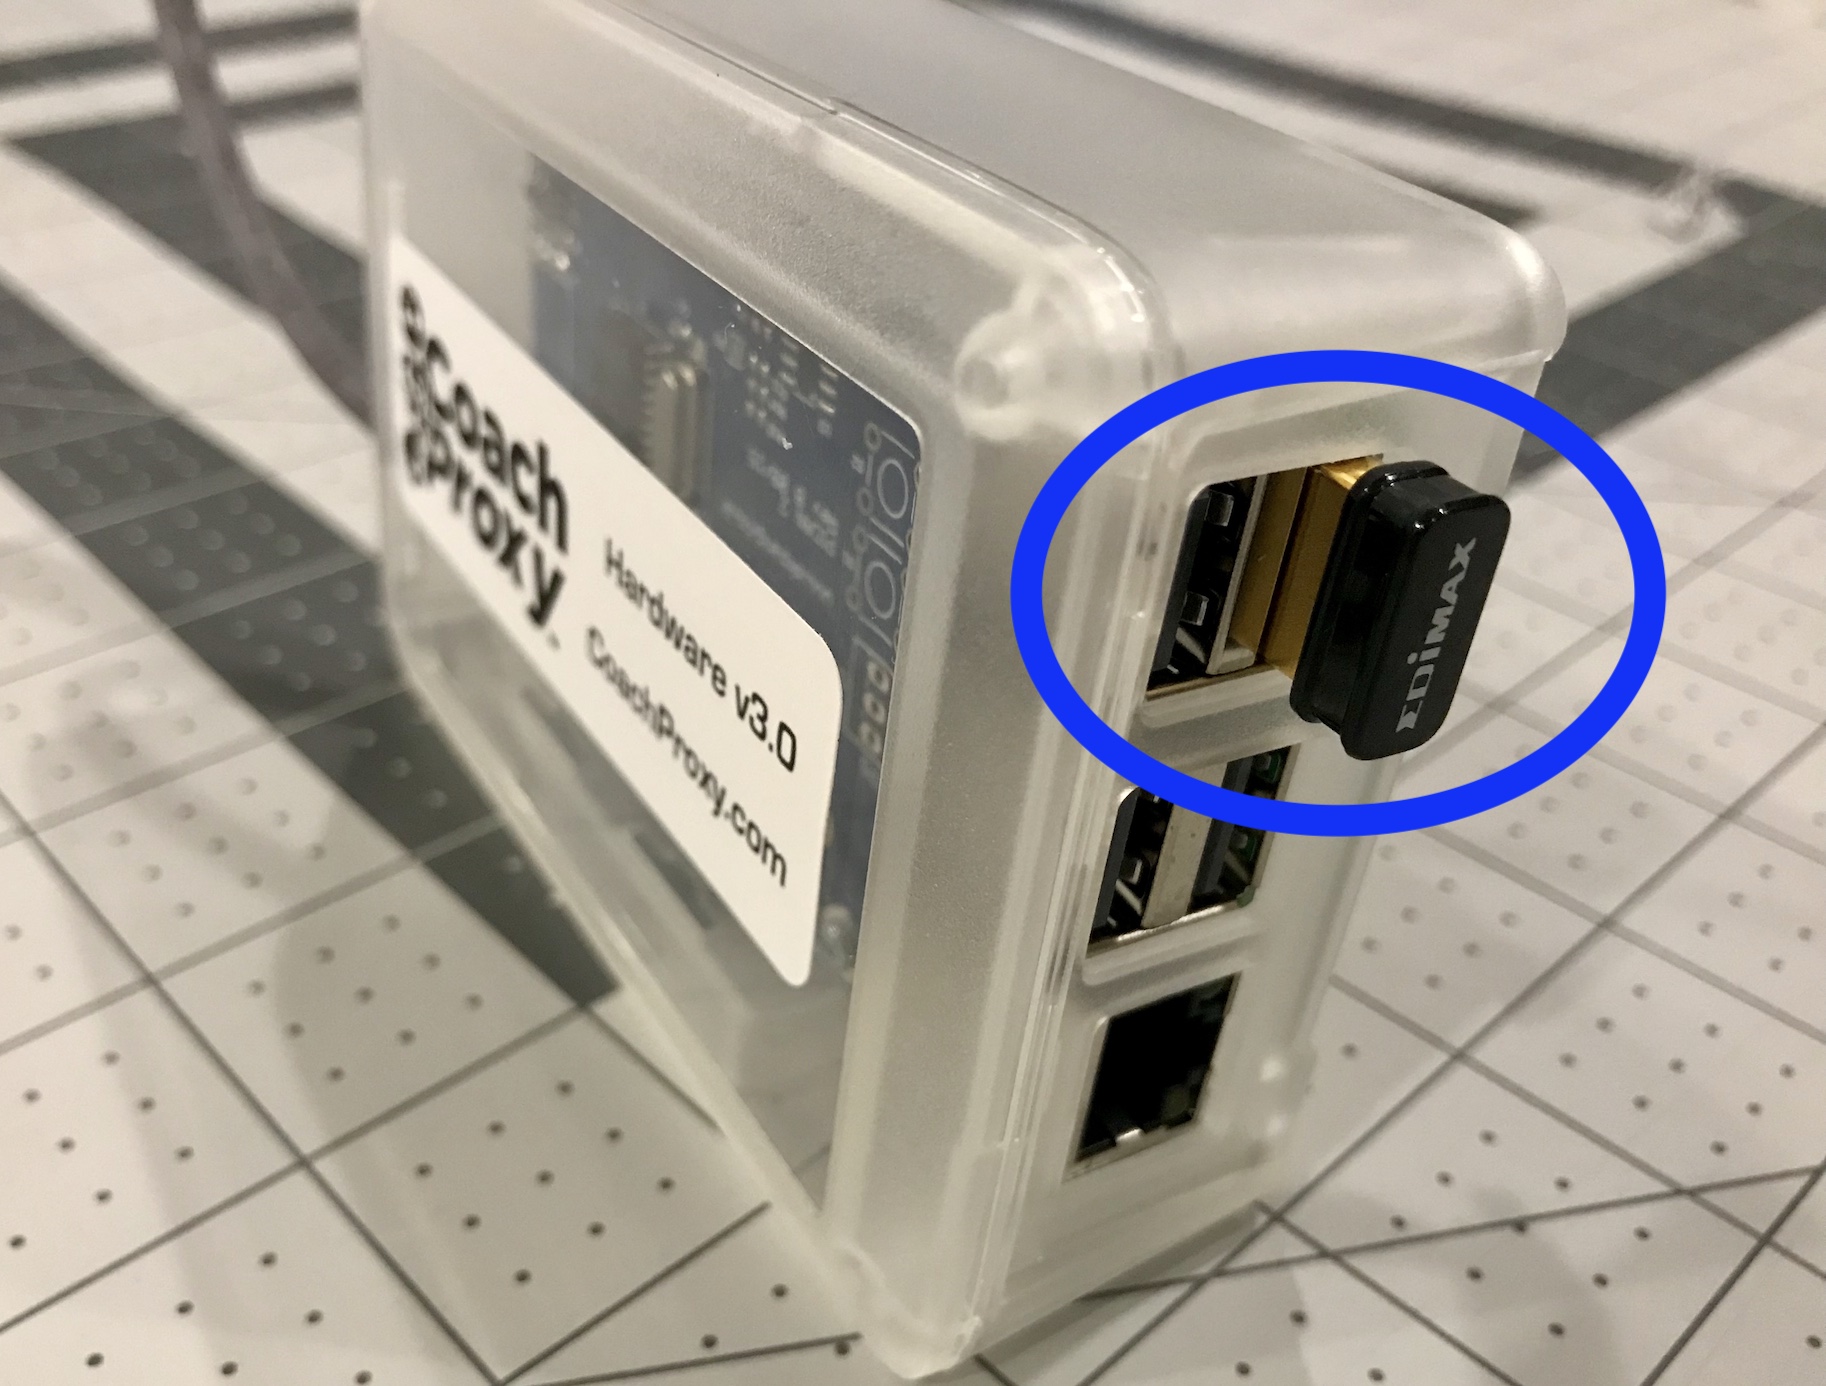
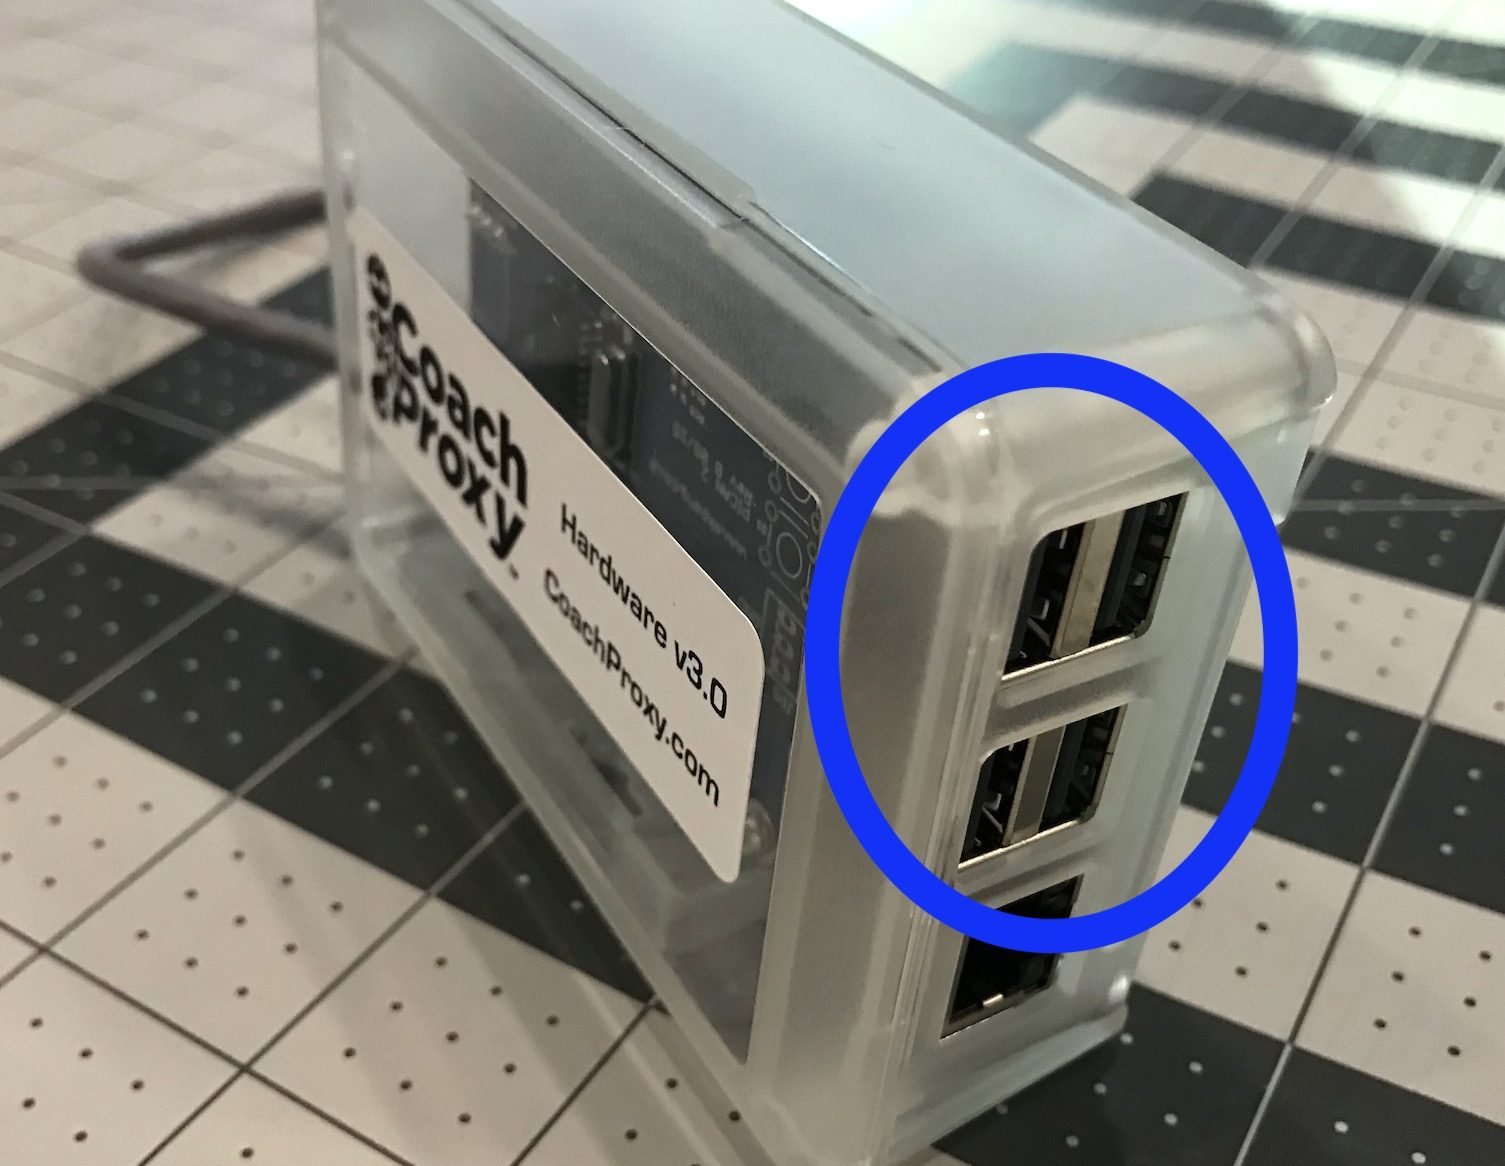
Be sure you download the correct version! If your CoachProxy has a small black connector in one of its USB ports, you need software version 3. If all four USB ports are empty, you need software version 2. Please see our CoachProxy 3.0 blog post for more information on software version 3.
Instructions:
- Download and save the CoachProxy software image file for your CoachProxy. The download is very large, approximately 800 MB. If your Internet connection is via a cellular phone or hotspot, please be aware of your monthly data usage limit.
- The link to download the software image is on your CoachProxy.com account dashboard. Just login to your account at https://coachproxy.com/my-account/ and choose the correct download link.
- Unplug CoachProxy from the Spyder Controls network by squeezing the small clip on the edge of the black network connector.
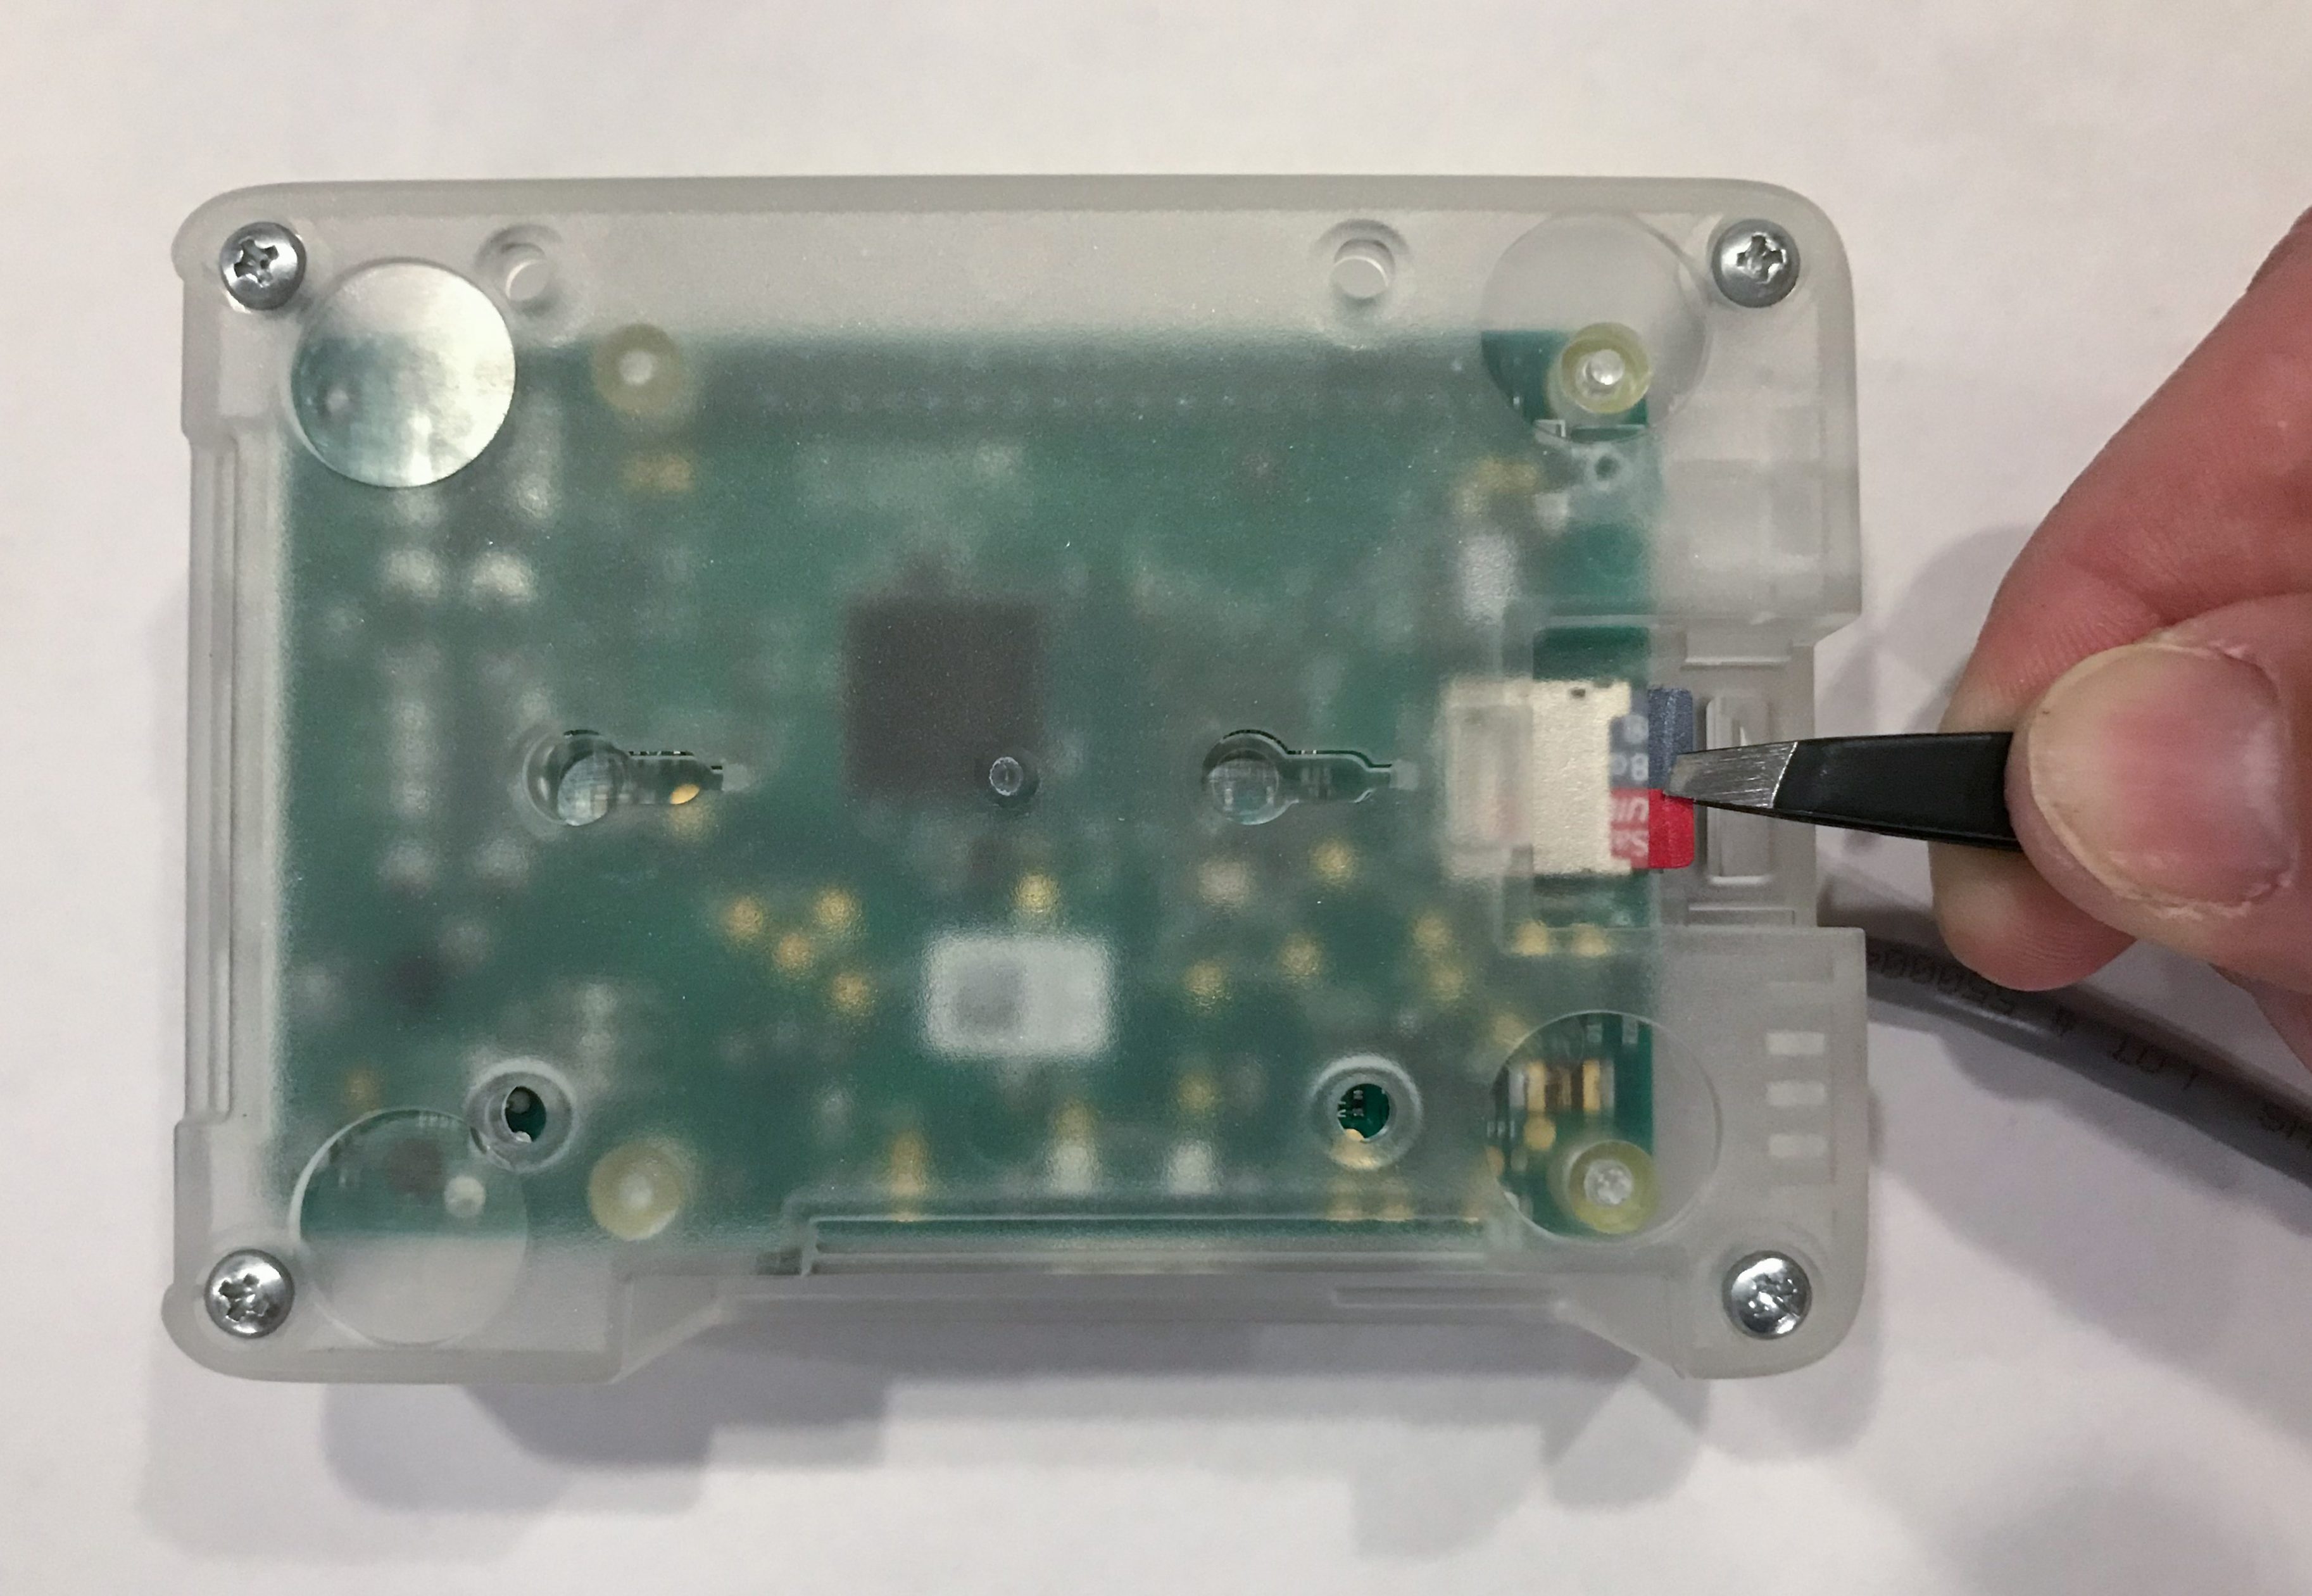
- Remove the microSD card from CoachProxy
- If you are looking at the bottom of the CoachProxy, the microSD card will be in a recess opposite the USB and network ports.
- The microSD card simply pulls out. Tweezers may help remove the card. Refer to the photos at the bottom of this page.
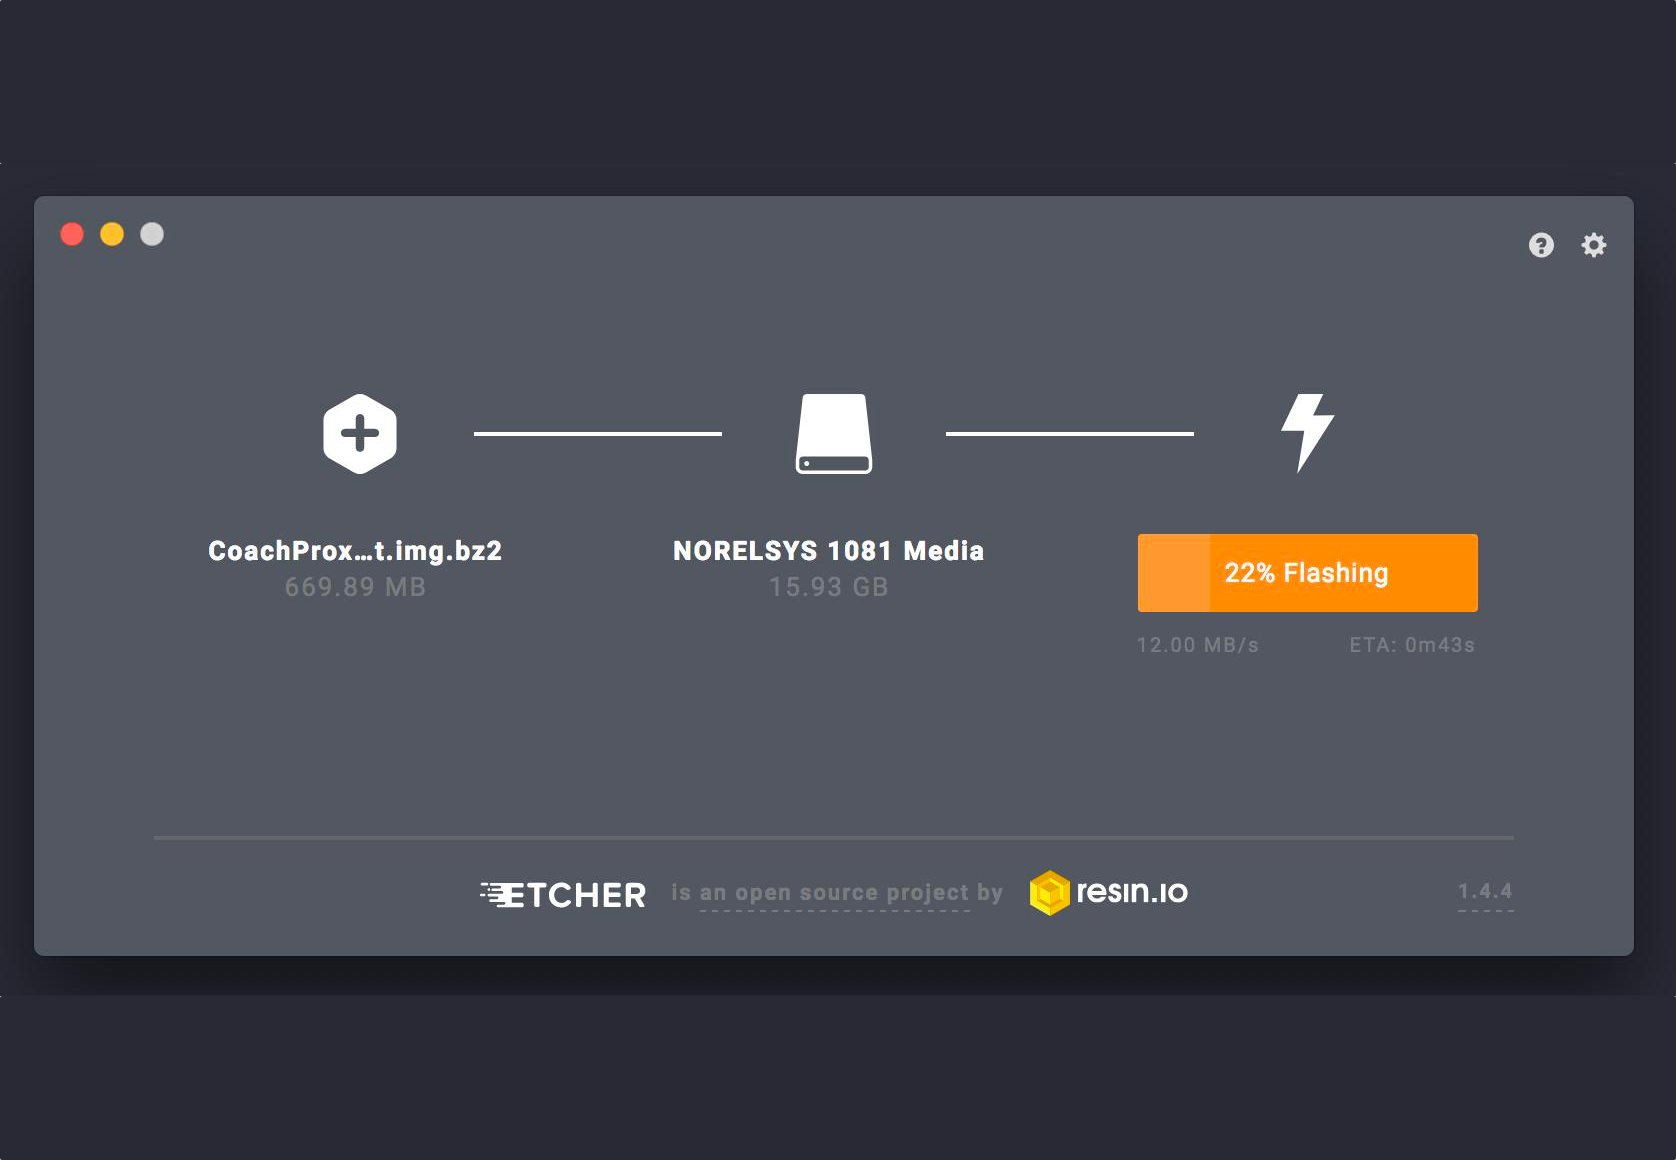
- Flash the downloaded software image onto the microSD card:
- Download and install the free “Etcher” program from https://etcher.io/
- Insert the microSD card into your computer or USB card reader.
- Run Etcher, select your downloaded
CoachProxy_#.img.zipfile, select your SD card, and click “Flash”. - Note: when it is finished, your computer may say that the card is unreadable. That’s OK!
- Once the image is written to the microSD card, remove it from your computer and re-insert it into CoachProxy.
- When holding CoachProxy upside down, the label of the microSD card will be toward you, and the metal pins toward the CoachProxy board, as shown in the photos below.
- Plug the CoachProxy network cable back into your coach’s Spyder network.
- Please wait at least two minutes for CoachProxy to start up.
- Follow our Initial Setup Instructions to connect to CoachProxy’s direct Wi-Fi network and configure CoachProxy for your coach and Wi-Fi network.
Optionally visit our Change Log for a list of what’s changed in each version.